A quick web UI for database management in docker-compose!
I have a lot of half-finished blog posts that I want to finish up soon coming back from both Reclaim Open and a week-long family vacation, but hey I might as well finish up this old draft as I used this trick yet again today. I’ve got to get the blog momentum going after a few month’s hiatus!
I work with docker and docker-compose very often for Reclaim Cloud stuff nowadays, and while I’m pretty comfortable with bind-mounts, docker volumes, and docker cp for getting files in and out of containers, doing serious things with databases still scares me a little. While I can use the CLI to do some stuff, I really like a UI when I need to poke around a database; particularly with anything more complicated than a dump or restore. In cPanel-land phpMyAdmin is already set up and ready to go, but I don’t have that luxury when working with docker-compose based stuff.
That’s where Adminer comes in handy. Tom Woodward mentioned it in a WPMS workshop (I think WPMS101 last fall?) and I was intrigued because it could do a lot of what phpMyAdmin does, but for any type of database (not just MySQL). On top of that, you only need to “install” a single PHP file, or add a few lines to a docker-compose setup!
Starting it
Now, whenever I need it, I can simply add a few lines to the “services” section of any docker-compose.yml file:
  adminer:
    image: adminer
    ports:
      - '8080:8080'
Here it is in the context of WordPress running in docker-compose1:
version: "3"

services:
  wordpress:
    image: wordpress
    restart: unless-stopped
    ports:
      - 80:80
    environment:
      WORDPRESS_DB_HOST: mysql
      WORDPRESS_DB_USER: foo
      WORDPRESS_DB_PASSWORD: bar
      WORDPRESS_DB_NAME: wordpress_db
    volumes:
      - ./public_html:/var/www/html
  mysql:
    image: mysql
    restart: unless-stopped
    environment:
      MYSQL_DATABASE: wordpress_db
      MYSQL_USER: foo
      MYSQL_PASSWORD: bar
      MYSQL_RANDOM_ROOT_PASSWORD: 1
    volumes:
      - ./db:/var/lib/mysql
  adminer:
    image: adminer
    ports:
      - '8080:8080'
Then I can start it up:
docker-compose up -d
I visit it by appending :8080 to the domain name of the thing I am running. In my example below, I’m just running it on my local computer, so the address is http://localhost:8080
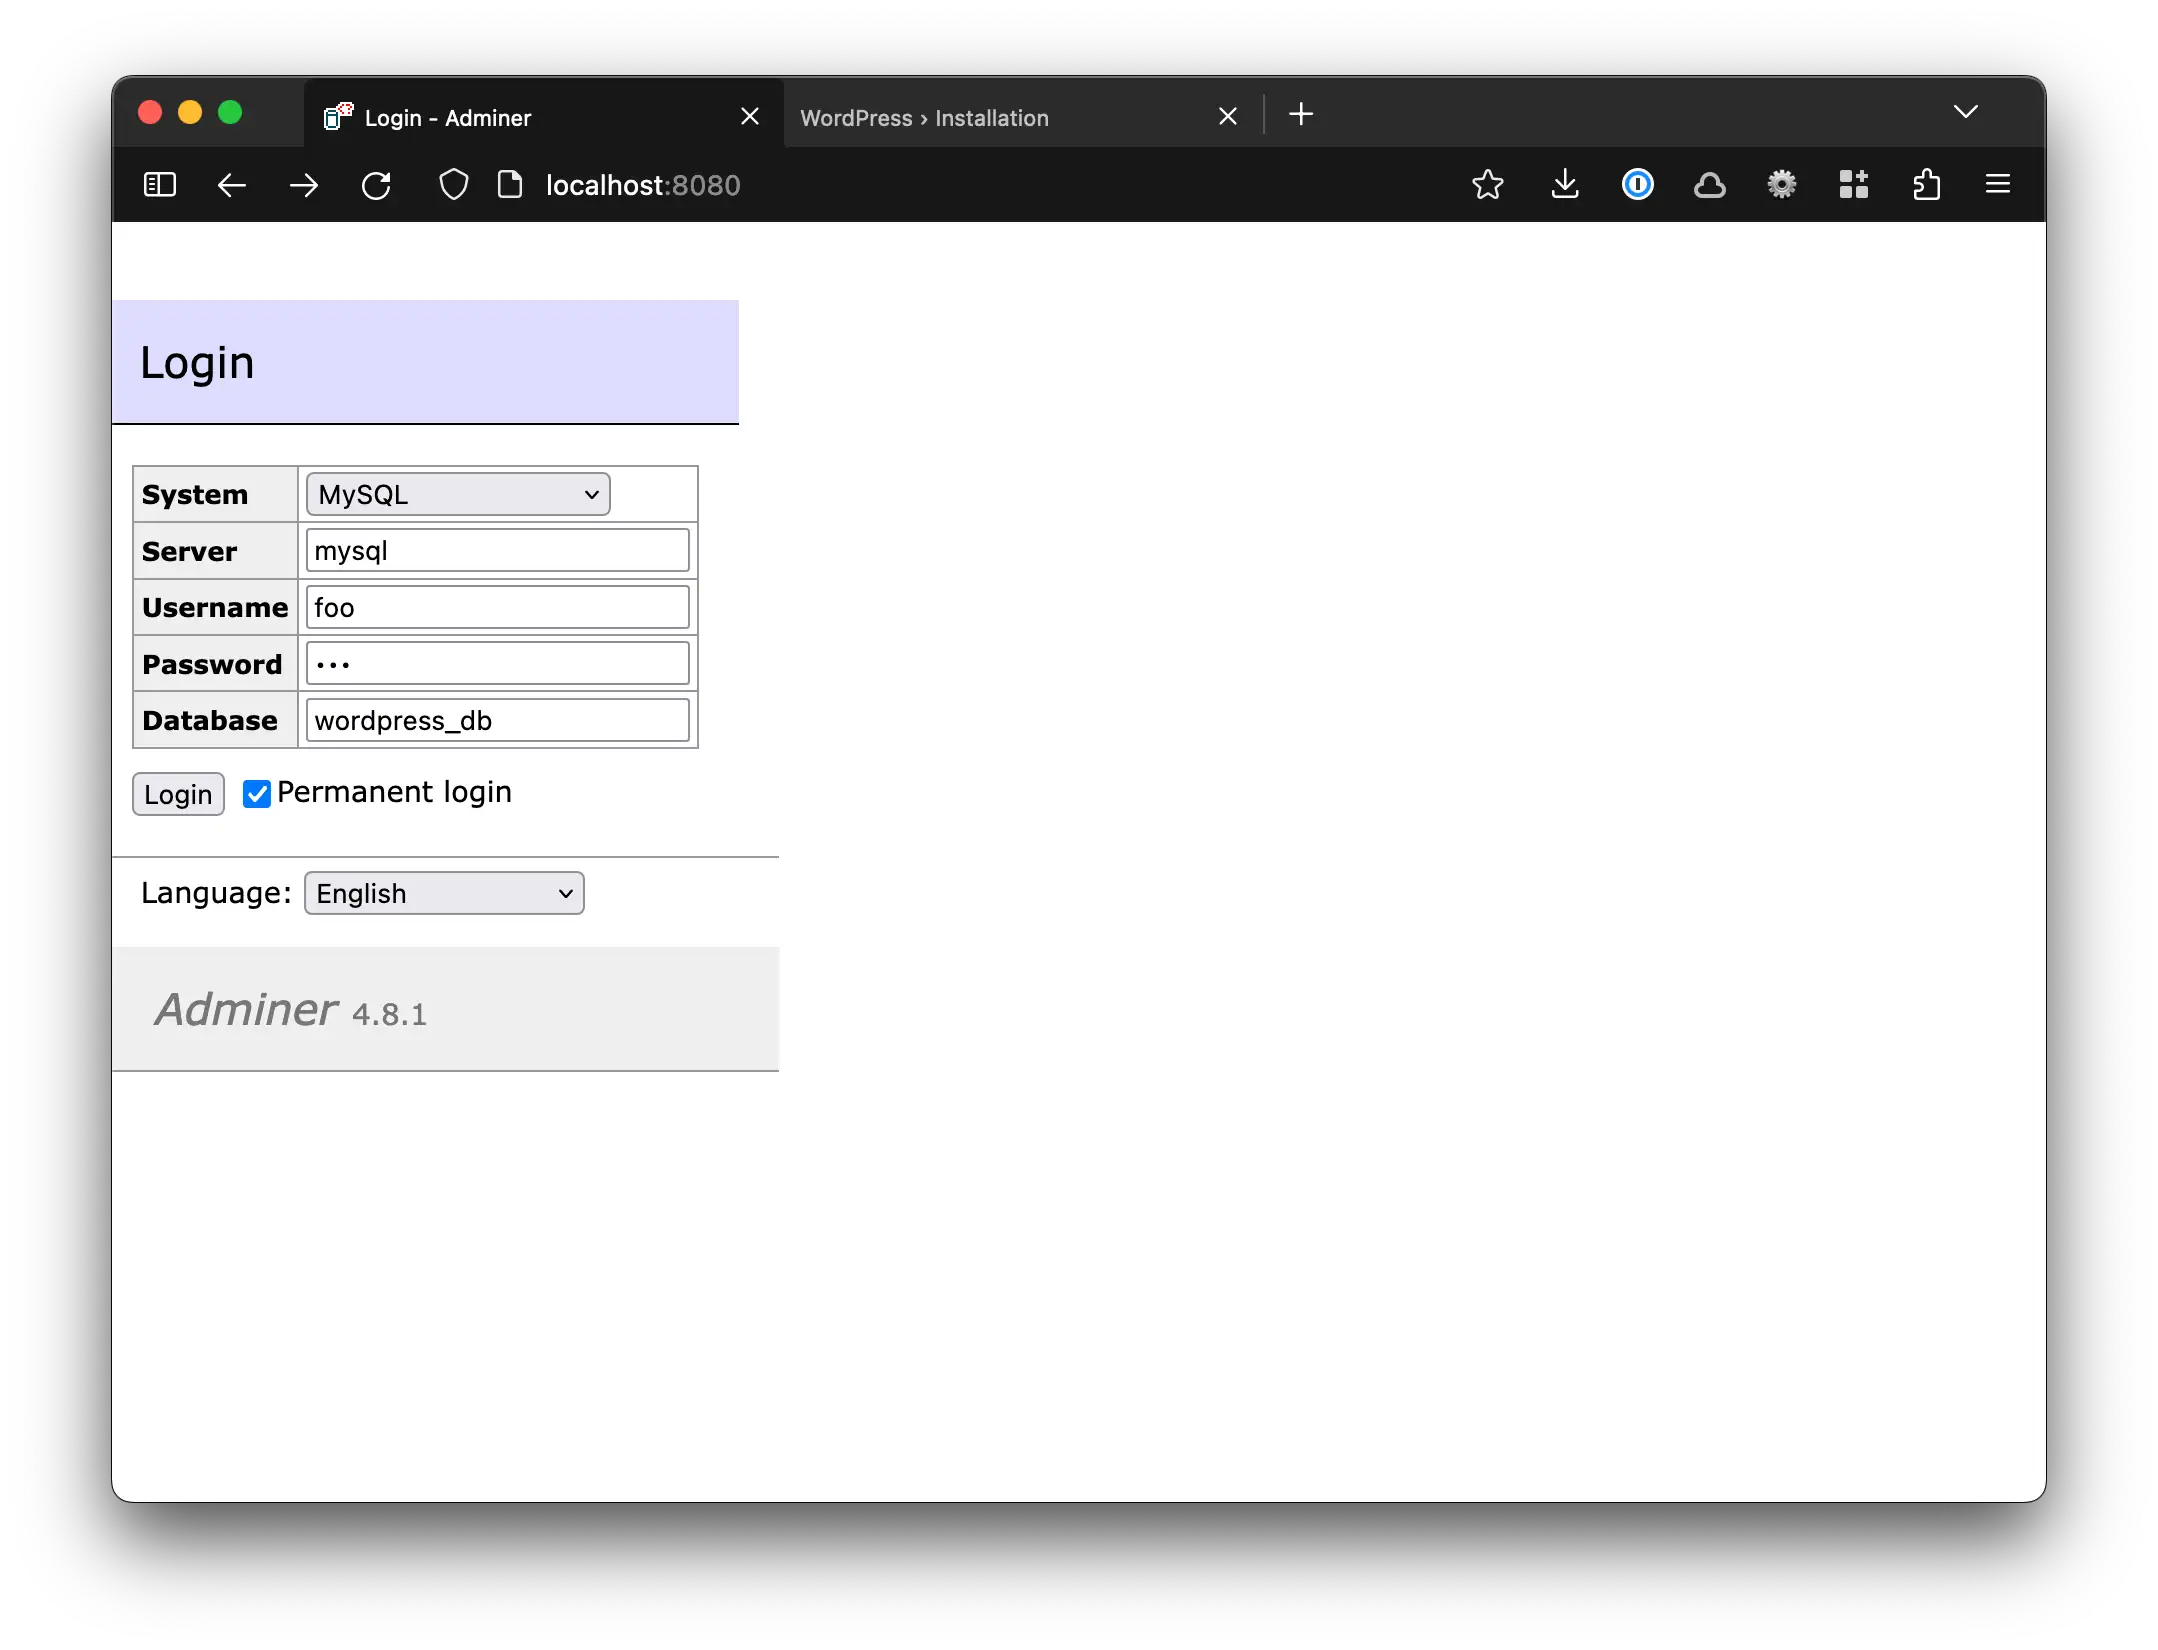
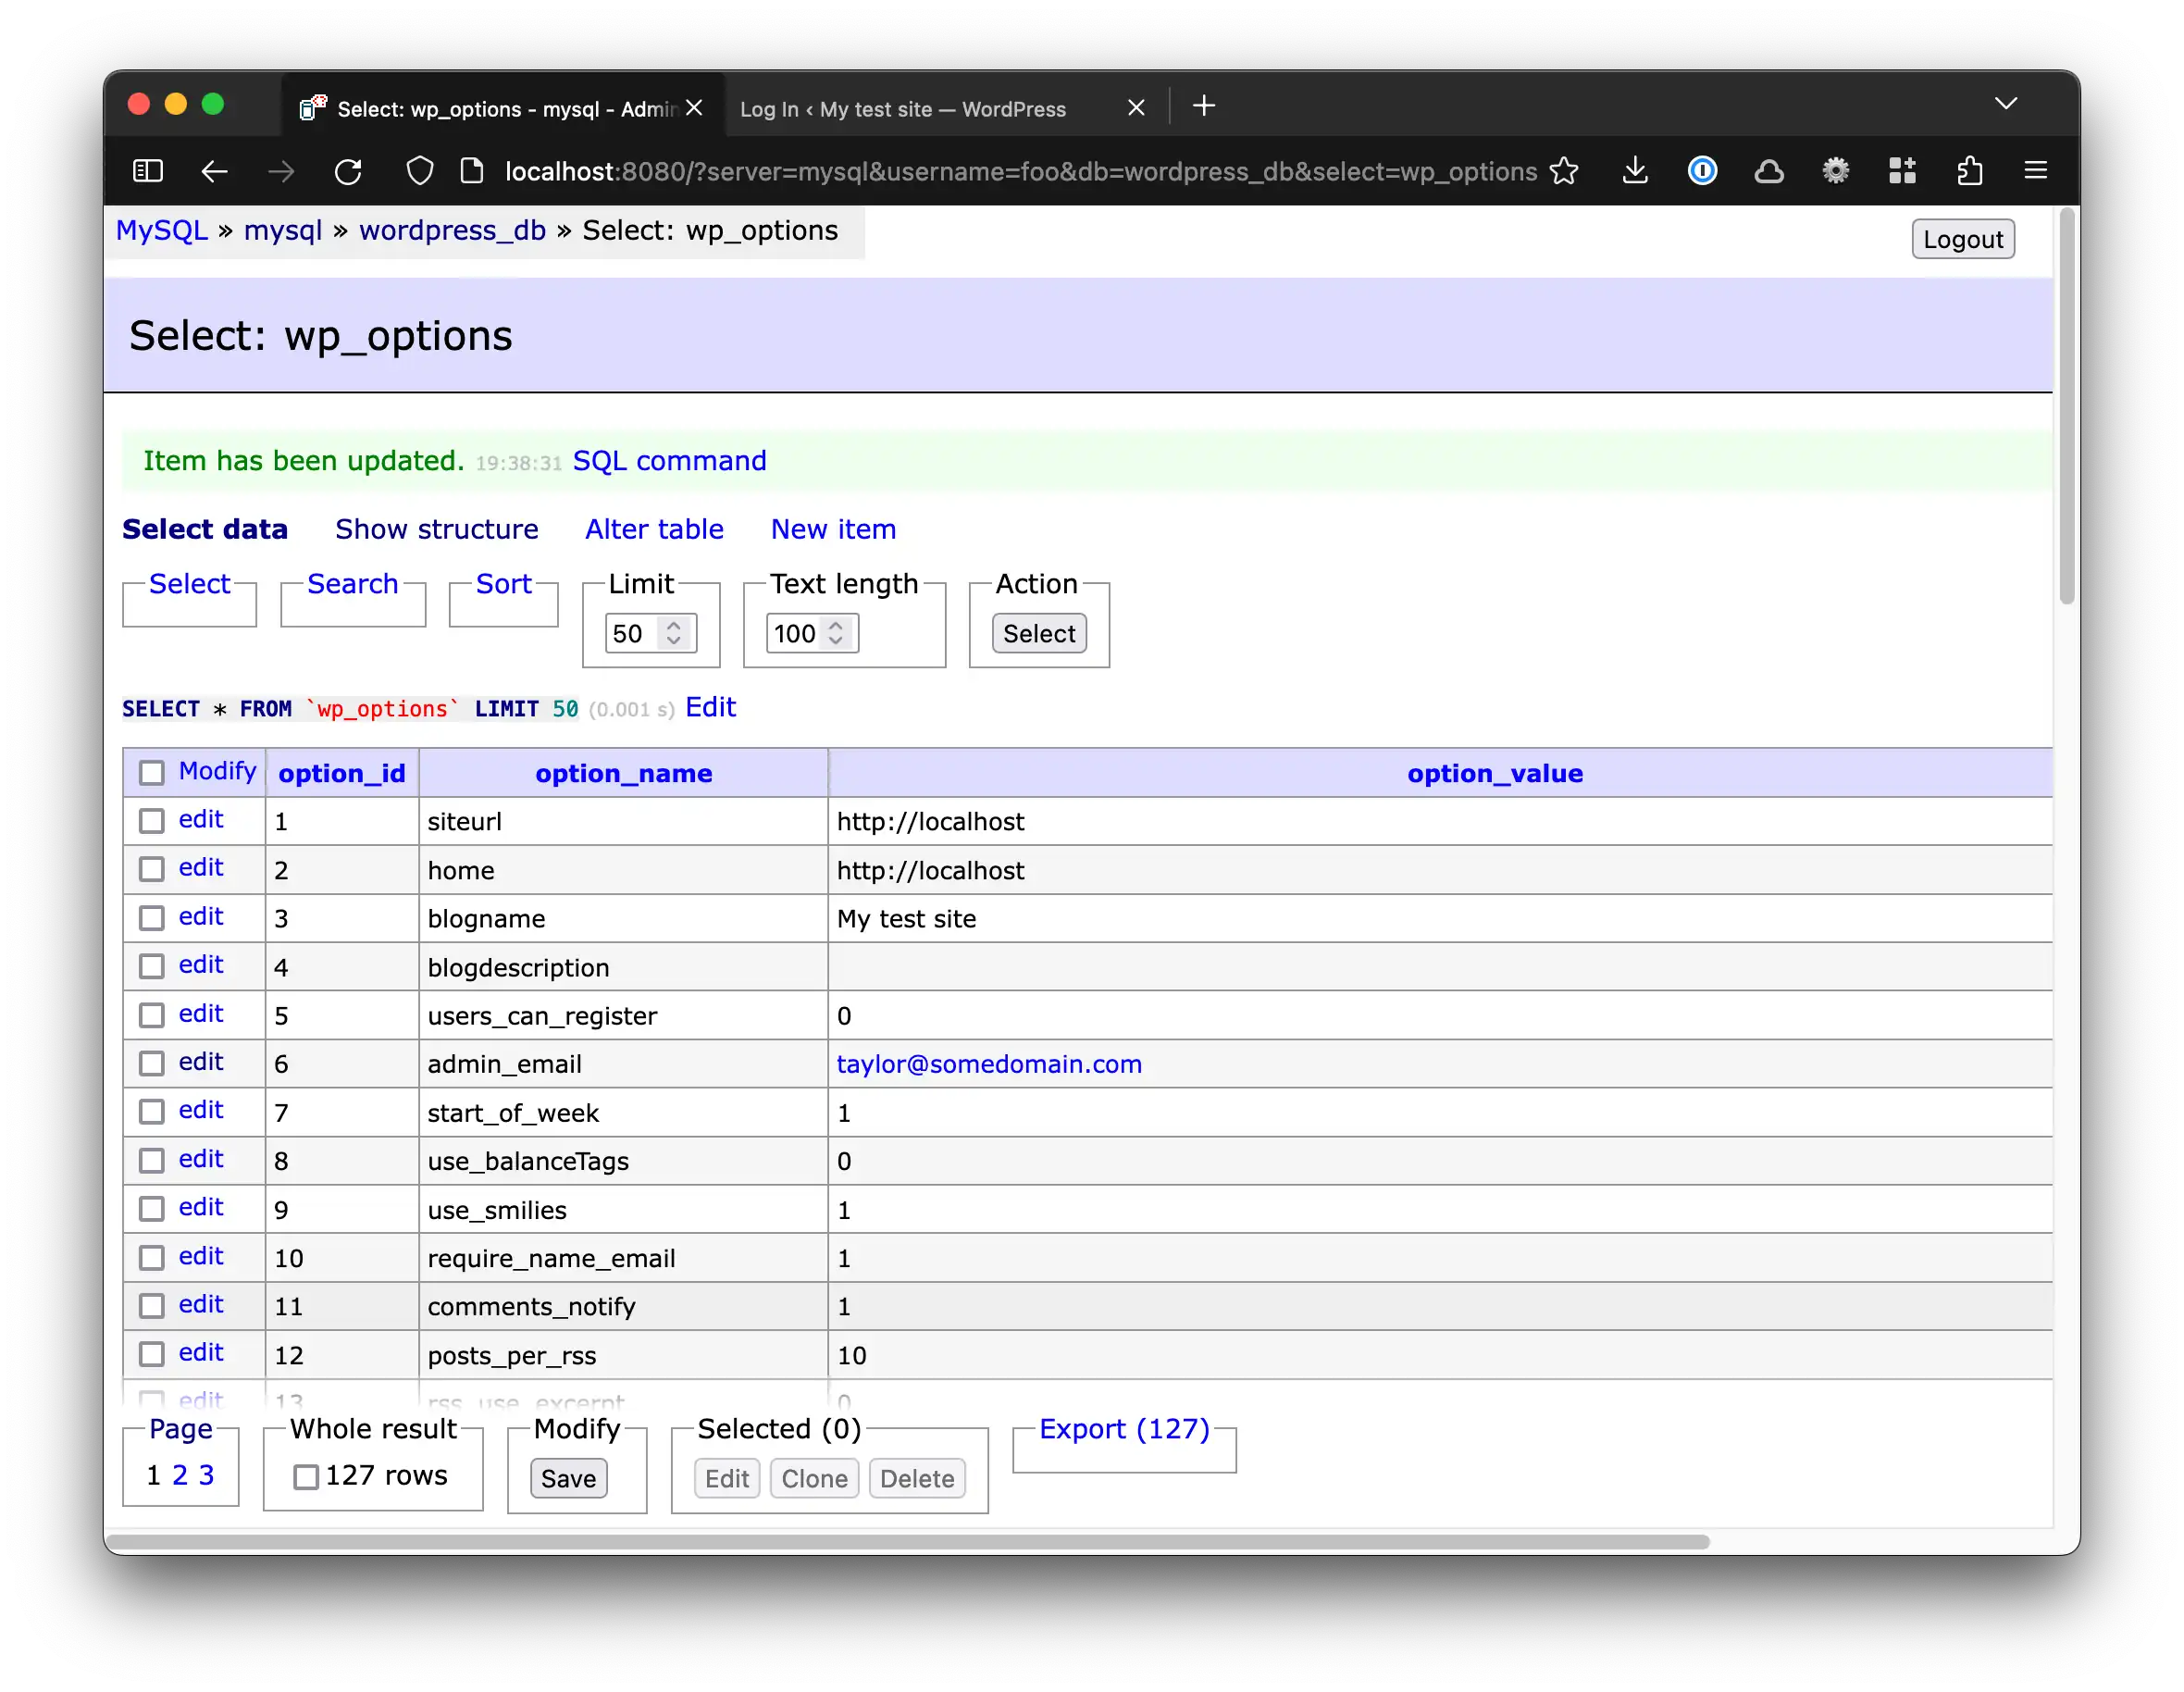
I can log in using the info I already know from my docker-compose file, and I get a very basic, but usable interface!
Removing it
Then, when I am done, I just comment out the lines for Adminer:
version: "3"

services:
  wordpress:
    image: wordpress
    restart: unless-stopped
    ports:
      - 80:80
    environment:
      WORDPRESS_DB_HOST: mysql
      WORDPRESS_DB_USER: foo
      WORDPRESS_DB_PASSWORD: bar
      WORDPRESS_DB_NAME: wordpress_db
    volumes:
      - ./public_html:/var/www/html
  mysql:
    image: mysql
    restart: unless-stopped
    environment:
      MYSQL_DATABASE: wordpress_db
      MYSQL_USER: foo
      MYSQL_PASSWORD: bar
      MYSQL_RANDOM_ROOT_PASSWORD: yes
    volumes:
      - ./db:/var/lib/mysql
  #adminer:
  #  image: adminer
  #  ports:
  #    - '8080:8080'
Finally, I run this command to stop Adminer, without having to restart any other docker containers:
docker-compose up -d --remove-orphans
Stopping Adminer when it’s not in use saves on resources2, as well as provides the security benefit of completing eliminating the possibility that anyone could log in to it.
Yes, I know that technically for a PHP app like WordPress, I could just drop Adminer’s single PHP file in the web root instead of adding lines to my docker-compose file, but I figured a WordPress-based docker-compose example would still be a good one to go with. ↩︎
Not that it really uses many 🤷🏻♂️ ↩︎
Comments